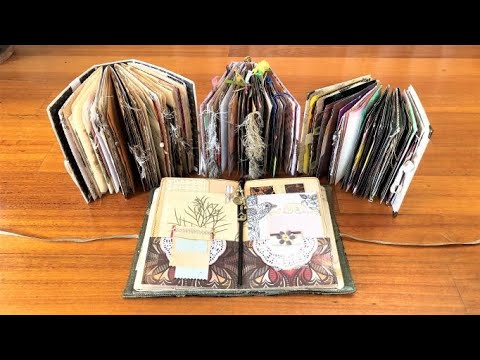
If you've ever looked at a pile of twigs in your backyard and thought they were good for nothing but the compost heap, this tutorial might change your mind. I show how to use tree branches as the spine element for hand-bound journals — wrapping thread directly around the branch through a simple three-hole pamphlet stitch to create something that looks genuinely wild and beautiful. The technique is quick, the materials cost almost nothing, and the finished journals have a raw, nature-forward quality that's hard to get any other way.
What we cover
This tutorial covers how to collect and prepare branches, assemble a signature (or mix of pages) for binding, execute a three-hole pamphlet stitch that wraps around the branch twice per hole for security and thickness, and embellish the cover with layered fabric, buttons, trim, and tea bags. By the end you'll have a complete small journal — and a method you can scale to as many holes as you like.
What you'll learn
How to select and prepare branches for bookbinding — including:
- Why straighter branches are better (curved ones take up space equivalent to a much thicker branch, and limit how far the pages can open)
- Collecting off the ground so branches are already dry and easy to snap
- Sizing options — branches can be taller than, equal to, or shorter than the page height, each giving a different feel
- A quick clean to remove dirt and loose debris before you start
How to assemble a page block for this style of binding, including:
- Single pages only
- Folded signatures only
- A combination of both (plus fabric pages) — all work with the same binding method
- How to make sure pages sit flush against the spine edge before you mark your holes
How to place your branch and mark binding holes — positioning the branch where you want it to sit in the finished journal, then marking three holes directly beneath it. This step matters: the holes need to align with the branch, so placing the branch first and marking under it (rather than guessing) saves you from misalignment later.
How to execute the three-hole pamphlet stitch with a branch spine, including:
- Starting at the back and pulling through to the front, leaving a short tail
- Wrapping around the branch and going back through the same hole — twice per hole, for extra security and a fuller look
- Tying a double or triple knot at the back after each hole
- Keeping thread tight throughout (a loose wrap means a loose branch in the finished book)
- How much thread to cut: approximately three times the height of your journal
Why I use embroidery floss here — and when to switch — embroidery floss works beautifully for thinner journals and gives a soft, textured look. For a thicker, heavier page block, waxed binding thread is a stronger choice and worth having on hand.
How to secure the knots so they don't work loose with use — dabbing a small amount of glue onto each finished knot after the binding is complete. Thread — even waxed thread — can be slippery, and a journal that gets opened and closed regularly needs that extra hold.
How to layer and stitch cover embellishments, including:
- Building up layers of fabric, handmade paper, trim, and tea bags before stitching anything down
- Piercing holes through all embellishment layers first so you know exactly where to stitch — no guessing once the needle is in your hand
- Sewing buttons directly through multiple layers in one pass
- Adding twine, stitching, and ripped paper edges to reinforce the grungy, natural aesthetic
- Why imperfection works in your favour here — edges don't need to be perfectly glued, things don't need to sit perfectly straight, and the more textured and rough the result, the better it suits the branch spine
Tips & gotchas
The single biggest thing that goes wrong with this binding is loose thread. If you're not pulling everything as tight as possible at every step — every wrap, every knot — the branch ends up shifting in the finished journal. It doesn't take much. Keep tension on the thread the entire time, and tie a double or triple knot (not a single) at each hole.
Straight branches make a real difference. A curved branch isn't just harder to work with — it effectively acts like a much thicker spine and limits how wide the pages can open. When you're collecting, prioritise the straighter ones. Gathering from the ground rather than breaking from a live tree means the wood is already dry, snaps cleanly to size, and doesn't need any treatment before you use it.
Measure your thread before you start: three times the height of your journal is the working rule. Too short and you'll run out mid-binding; too long and you're managing excess, but excess is always the better problem.
When it comes to the knots — glue them. I add a small dab to every knot as a final step, after all the embellishing is done. Embroidery floss especially has a tendency to loosen with regular handling, and even waxed thread isn't immune. The glue takes seconds and means the binding lasts.
For cover embellishments, pierce your holes through all the layers before you start stitching. Trying to push a needle through multiple layers of fabric, paper, and trim while holding everything in position is awkward at best. Piercing first gives you a clear path and makes the stitching itself much easier.
One thing worth knowing about this project specifically: the irregularity of the branch actually gives you more creative freedom, not less. Things don't need to be perfectly aligned. Ripped edges, loosely glued layers, and visible texture all read as intentional. Once I understood that, I stopped fussing — and the journals looked better for it.
And because the cover embellishment process here is so open-ended — layering fabric scraps, tea bags, handmade paper, buttons, twine — it's a good entry point into building covers from found and upcycled materials more generally. The branches are the start of something.