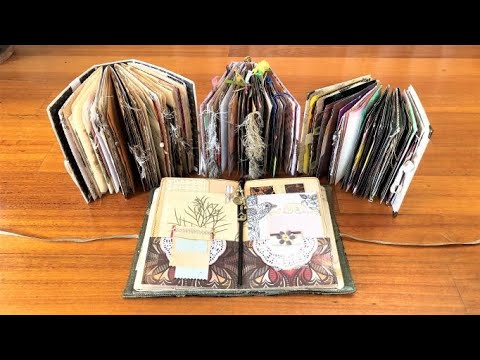
If you've got a stack of loose single sheets — tea-dyed pages, music paper, scrapbook offcuts, vellum — and no idea how to hold them together as a book, Japanese stab binding is the answer. In this tutorial I walk through the whole process from scratch: marking and punching the holes, measuring your thread, starting the binding from the middle of the book, and finishing with a clean knot hidden inside the spine. I also show a handful of finished projects so you can see how the same basic method looks with three holes, seven holes, or seventeen — and with pages of all different sizes mixed together.
What we cover
This is a full step-by-step tutorial for Japanese stab binding using single sheets of paper — no signatures, no glue. I demonstrate two projects live (one with three holes, one with seven), then show a range of finished books with different hole counts, page types, and spine widths. The written step-by-step instructions appear at the end of the video so you can screenshot them for reference.
What you'll learn
How to gather and align your pages before binding — including how to handle a mix of different-sized sheets. Not everything needs to match; shorter pages, folded pages, and even a page left long for a pocket all work fine. Bulldog clips or paper clips hold everything steady while you mark and punch.
How to mark and punch your holes, including:
- Centering your spine line about one centimeter (or up to an inch) from the edge — your choice, and it changes the look
- Spacing holes evenly, or deliberately unevenly for a more organic pattern
- Choosing how many holes — three works for small pages, five is better for medium, seven or more for larger formats where three holes would leave gaps
How to measure your thread — roughly four times the height of the book for seven holes; six to seven times for seventeen holes. Embroidery floss works beautifully here, and I use it throughout.
Why you start binding from the middle of the book, not from a cover — and how to use a sticky note to mark that middle page so you can find the tail end later. Starting from the center is what allows you to finish with both tails meeting on the inside for a clean, hidden knot.
The core stab binding stitch sequence, including:
- Weaving toward the first (or last) hole
- Wrapping the spine by going back through the same hole
- Returning toward center, wrapping each hole as you go
- Repeating the same sequence on the opposite side
How to wrap or not wrap the spine ends — both options shown side by side. Wrapping adds a more finished look at the top and bottom holes; skipping it is simpler and still holds clean.
How to finish the binding — threading the needle back through to meet the tail inside the book, then tying a double knot (or a bow, if you like). This is the trickiest moment in the whole process and I show exactly how to shimmy the needle in at an angle to find the tail without going all the way through.
How to add a pocket page — leaving one sheet slightly longer, then folding and tucking it after binding is done. A simple way to add a functional element without changing the binding at all.
What the stitch looks like across different hole counts and spine widths — I show the same method at three holes (minimal, cleaner), five holes (better for medium pages), seven holes, and seventeen holes, with honest notes on which I personally prefer and why.
Tips & gotchas
Use bulldog clips or paper clips to hold your pages aligned before you start punching — if anything shifts mid-punch you'll have misaligned holes that can't be fixed. Clip both sides of the spine edge if your stack is thick.
Leave a tail of about 7 cm (three inches) when you start the binding from the middle page. Too short and you'll have nothing to knot with at the end; too long and it gets tangled as you work.
Keep your thread firm as you stitch, but not so tight you cut through the paper. This is especially easy to do with embroidery floss on thinner sheets — pull steadily rather than yanking.
If you're using embroidery floss, watch out for splitting the strands with your needle. Embroidery floss is six strands twisted together, and if your needle catches through the middle of the floss on a previous pass, everything bunches. Maneuver the needle to the side of the thread rather than through it. If this keeps happening, waxed thread (single strand) is an easier material to work with.
Mark your middle page with a sticky note before you start. When you're finishing the binding and need to find the tail end inside the book, that sticky note saves you from hunting through every page.
For larger pages, use at least five holes. Three holes on a big page leaves visible gaps along the spine — the pages splay. Five holds everything together properly, and more holes just adds visual interest from there.
For thread quantity: four times the book height is enough for seven holes. For seventeen holes, aim for six to seven times the height. It's better to cut slightly long than to run out mid-stitch.
The same stitch works on copy paper, tea-dyed pages, music paper, vellum, scrapbook paper offcuts — basically anything flat. You can vary the spine width, add more holes for a denser decorative effect, leave a page long for a pocket, or wrap the spine ends for a more finished look. Little booklets made from project offcuts bind just as cleanly as larger journals. The structure is simple enough that once you've done it once, you can adapt it to whatever paper happens to be in front of you.