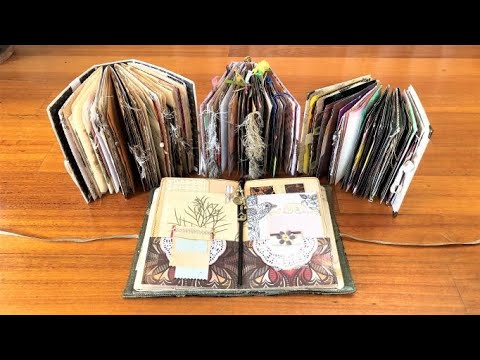
If you've been letting paper scraps pile up on your desk — those narrow offcuts from trimming signatures, the strips left over from cutting pages down to size, the odd pieces of scrapbook paper or watercolor paper you couldn't bring yourself to throw away — this is the video that gives them a destination. I made 60 mini booklets and charm journals in a couple of days using nothing but what was already on my table, and in this tutorial I walk through all 11 ways to do it.
What we cover
Eleven different ways to turn paper strips and offcuts into small, finished booklets — from the simplest fold-and-sew construction all the way through ring-bound mini journals, kettle stitch booklets, matchbook-style covers, and charm booklets with attached closures. The tutorial also pulls in fabric scraps, leather offcuts, embroidery floss, jump rings, and eyelets, so there's something here for whatever's in your scrap bin.
What you'll learn
How to make a basic folded-strip booklet and bind it three different ways, including:
- Machine sewing straight through the spine — quick, reliable, and doesn't require any hand-sewing skill
- Single-staple binding using a standard home stapler opened flat (with a soft surface underneath to let the staple bend)
- Two-hole hand stitching with a needle and thread, tied off with a simple knot on the inside
How to use a folded paper booklet as a mini handbag journal — nesting several offcuts together, threading beads onto a short cord for a handle, knotting it through two holes in the spine, and adding an elastic lace closure so the cover stays shut.
How to make a charm booklet with a jump ring, so the finished piece can hang from a tassel, clip onto a journal spine, or dangle from a paper clip inside a junk journal page. The eyelet sets the hole cleanly and keeps the top of the booklet from tearing over time.
How to make ring-bound mini booklets with leather or scrapbook paper covers, including:
- Cutting offcuts to single-sheet pages that open completely flat
- Marking and punching five holes consistently across the stack
- Attaching jump rings one by one for a clean, professional result without any binding machine
How to shape a mini tag booklet — orienting the booklet vertically, adding an eyelet at the top (which also acts as a closure), trimming the shoulders into a tag shape, and inking the edges for a finished look.
How to make wraparound mini journals from fabric and leather offcuts — binding a small signature into a strip of leather or fraying fabric using two-hole stitching, then adding an eyelet closure so the cover wraps and holds.
How to attach booklets to a chain or tassel so they can live on a journal cover, be taken off and consulted, and put back — useful for things like goals or bucket lists that you want nearby but not inside your daily journal.
How to construct a matchbook-style booklet — binding a signature using a three-hole pamphlet stitch, leaving the cover piece long enough to fold over and create a flap, then using a paint chip sample (or a piece of ribbon or stretchy lace) to make a notch closure that holds the flap down.
How to make kettle stitch mini books from offcuts — working with multiple signatures (the video shows booklets with three and five signatures) so the finished piece lays flat wherever you open it. I'll do a full separate kettle stitch tutorial at some point; this video gives you the overview and the result.
How to make a money-wad booklet — a simple two-hole stitched booklet kept closed with a paper clip or bulldog clip, with a small charm on the spine.
How to attach a twine closure permanently to the binding using a three-hole pamphlet stitch, feeding the twine through the binding holes so it can't come free, then tying it off as a bow at the front. This is the technique I like best for the little stacked-gift look — it keeps everything tidy without any extra hardware.
How to use paint chip samples as closures — a nod to my paint swatch project video, where I show how gluing one half of a circular chip to the cover creates a notch the other half can tuck under.
Tips & gotchas
After folding your strips, always trim the side edges before binding. The fold creates a closed edge on one side — if you don't cut it open, the pages won't actually turn. Easy to forget when you're in a rhythm.
If your stapler won't open flat, you'll need either a long-arm stapler or something soft (a piece of foam, a folded cloth) underneath the booklet to let the staple legs bend and close. Standard home staplers do open — check the underside — but not all of them open fully, and forcing it doesn't work.
Paper clips make lovely closures for the money-wad style, but only if your booklet is thin enough for one to actually fit. If the stack is too thick, swap to a bulldog clip or a small elastic.
For the matchbook, leave the cover piece deliberately longer on one end before you bind — that extra length becomes your flap. Cut it down after binding to get the overlap you want, then figure out your closure notch from there. If you trim it flush first, there's nothing left to work with.
Once you've added a twine or elastic closure, place the booklet under something heavy while the glue or knot sets. They have a tendency to spring back open otherwise, especially the thinner ones.
If you're adding an eyelet, do that step before you add stickers or other embellishments around the hole. Trying to set an eyelet once you've already decorated the cover usually means damaging something nearby.
They all become covers, signatures, or wrap pieces. The ring-bound style and the kettle stitch books in particular are worth revisiting with better paper when you want something that'll last — the construction is the same, but the result feels much more substantial. And if you're looking for a handmade gift that takes an hour and uses nothing you'd otherwise keep, the stacked closure booklets tied with a bow are the ones I'd reach for first.