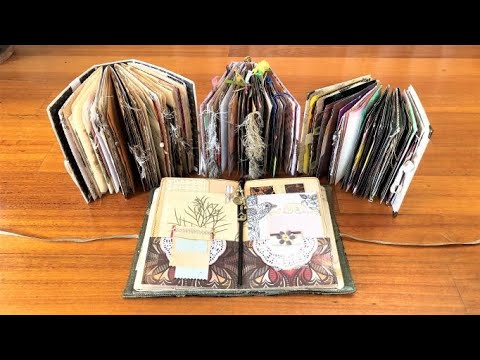
If you've been put off bookbinding because of the sewing — the needles, the waxed thread, the way signatures somehow always seem to come loose — this tutorial is worth watching. Twine binding is a no-sew method that holds signatures in place without a single stitch, lets the book lay completely flat wherever you open it, and keeps the structure open enough that you can slide pages in or take them out long after the journal is finished.
What we cover
This is a complete walkthrough of the twine binding method for handmade journals — from measuring the cord and wrapping the spine, through spacing the strings and sliding signatures in, to tying off and securing the knot. I also go through the one structural prep step that makes or breaks how clean the finished journal looks.
What you'll learn
Why spine reinforcement matters for this binding — because the twine wraps tight around the spine, a flimsy cover will bend inward and stay bent. The fix is simple: glue a piece of thick cardstock or chipboard to the inside of the spine before you start. I use a reclaimed Reader's Digest cover for my journals, and the reinforcement is what makes it hold its shape.
How to calculate how much twine you need — the formula is: (number of signatures × 2) + 2 extra lengths for tying off. For five signatures that's twelve spine-lengths. I always measure a little extra rather than risk coming up short mid-wrap.
How to wrap the twine around the spine, including:
- Holding one full spine-length against the cover with your thumb while you wrap
- Keeping strings parallel and not crossing as you go
- Wrapping just tight enough to stay in place, but loose enough that signatures can still slide through
How to count your inner strings — before you do anything else with the loose ends, check that you have exactly the right number of strings sitting inside the spine. For five signatures, you need five strings on the inside. This is the moment to catch the count before it's tied off.
How to secure the wrap with a twist and a knot — crossing the two loose ends over each other, tucking one end underneath all the running strings, and bringing both loose ends to the same side before tying a simple knot. The twist placement is up to you — center spine, top, wherever you want the decorative element to sit.
How to space the strings evenly before adding signatures — once the knot is tied, space the loops across the spine so there's a clear, even gap for each signature. It's worth doing this before you start sliding pages in, not only after.
How to slide signatures in one by one — open each signature to its center fold and slide it onto its string, working from front to back in order. Patience matters here: go slowly and make sure no pages are folding as the signature goes through, especially once you have a few in place and the fit gets snugger.
Why this binding lets you add or remove pages later — unlike a sewn binding, the signatures aren't locked in. You can slide a new signature in or pull one out any time, which makes this a genuinely living structure rather than a fixed one.
Tips & gotchas
Reinforce the spine before you bind. I said it in the learning section and I'll say it again here because skipping it is the most common reason the finished journal looks off. A cereal-box weight of card is usually not enough — use chipboard or double up on thick cardstock.
When you wrap, aim for firm but not strangling. If you pull too tight, you'll find it nearly impossible to slide signatures through later, especially when the journal is partway full. The strings should sit snug against the spine but still have just enough give to let a folded signature pass.
Before you tie your knot, look inside the spine and check that none of the strings are overlapping. Overlapping strings mean uneven signature spacing, and once the knot is tied it's annoying to fix.
Add a small drop of glue to the bow or knot once you're happy with the binding. Twine and lightweight string has a way of working itself loose over time — the glue is cheap insurance.
Hold off on heavy embellishing until after the signatures are in. Lace, raised elements, or anything with a ridge will catch as you slide pages through. I learned this from experience: even a bit of lace along a signature edge was enough to slow things down noticeably.
If you want the closed journal to sit flat on a table, think about what you put at the knot. Flat embellishments and small beads are fine. Chunky beads will prop the book up on one side. If you love the look of beads, position the knot so the beads can be slid out of the way when the book is resting.
Always cut more twine than the formula calls for. The formula gives you the minimum — a little extra at the ends makes tying the bow comfortable and leaves room to adjust if your first attempt at the knot isn't quite where you want it.
The removable-signature feature in particular changes how you can think about designing pages — you can work on signatures flat, embellish them fully, then slide them into a cover that's already finished. It also pairs well with elastic binding if you want an even easier variation, or with more structured covers if you want the same flat-lay quality with more weight to the book.