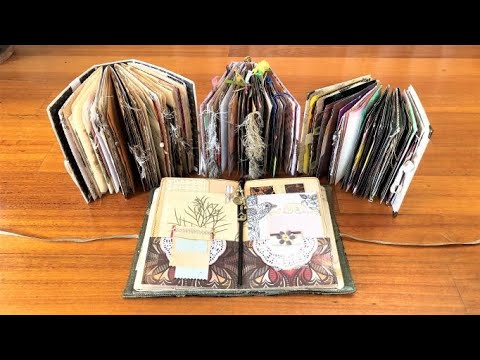
If you've been curious about twine binding — what it actually looks like inside a finished journal, how removable pages work in practice, and how these journals come together when you're making a small batch for your Etsy shop — this flip-through is a good place to start. I've just finished four twine binding journals using upcycled Reader's Digest books as the base, and I take you through each one: the covers, the signatures, all the little bits tucked inside, and the binding details that make this style so practical to sell.
What we cover
A complete flip-through of four handmade twine binding journals made from altered Reader's Digest books — three similar in size and one slightly larger. I walk through the first journal in full detail (covers, spine reinforcement, five signatures, all interior elements) and then do a quicker flip through the remaining three, pointing out what's different and why I made those choices.
What you'll learn
How twine binding differs from sewn-signature binding — the twine sits along the spine rather than stitching through the signatures, so the book opens completely flat. Pages can also be slid out individually or added in without rebinding the whole book.
Why I keep the inside of twine binding journals lightly embellished, including:
- Heavily decorated pages can prevent signatures from sliding freely in and out
- Leaving space lets the buyer add their own personal pages, memories, and ephemera
- A cleaner interior photographs better and ships more reliably
How to reinforce a twine binding spine — I cut an extra piece of cardboard, cover it in muslin, and glue it inside the spine before binding. The twine strings put real lateral pressure on the spine as you use the journal; without that extra layer, the cover starts to bend over time.
How to construct covers using upcycled book covers as the base, including:
- Covering both sides with heavier-weight scrapbook paper
- Sealing everything with sealant so nothing lifts with handling
- Adhering postcards, dried flowers, and charms so they stay put through regular use
Adding an eyelet and ribbon closure — I punch an eyelet into the cover, thread ribbon through, and leave the ribbon deliberately long so the buyer can trim it to their preferred wrap length.
How to use laminated pressed flowers as journal embellishments — flowers my mum collected over twenty and thirty years, laminated and tucked into signatures. I have a separate tutorial on the laminating process (linked in the video description).
How to use book pages and stamps together as a quick, polished interior element — stamping directly onto original book pages (a foreign-language page, a pulled quote, a printed image) gives an instant layered look without a lot of extra materials.
Why I tear out quotes rather than photocopying them — using an original page from a book in a handmade journal is fine; photocopying it technically crosses into copyright territory. Tearing the page and using it directly is both legal and, honestly, more characterful anyway.
How to create pocket signatures and journaling spots inside a twine binding journal, including:
- Folded scrapbook paper pockets tucked into signatures
- Journaling cards held loosely with a paper clip charm so they can be removed
- Stamped book pages and sentiments that give the journal a starting point without filling it up
How tea-dyed pages look and function in a sellable journal — I include baking paper that's been tea-dyed in some signatures. It can be used as-is for writing or pulled out and used as embellishment material, which gives buyers something extra to work with.
Tips & gotchas
Reinforce the spine before you bind. The pressure from twine strings is more than it looks — over time, an unreinforced spine will start to curve inward. An extra strip of cardboard covered in muslin, glued in place before you do the binding, keeps everything solid.
Glue your bows and charms down. A loose bow or a charm that shifts around will rattle in shipping and looks less finished in person. A small amount of adhesive under each piece costs nothing and makes a real difference when someone opens the package.
Leave ribbon long. When you add an eyelet-and-ribbon closure, don't pre-trim the ribbon to what looks right to you. Leave it long — the buyer can shorten it to fit their wrist or their preferred wrapping style, but they can't add length back.
Seal everything. Covers, postcards, dried flowers, paper layers — everything gets sealant. Paper and ephemera shift slightly just from being handled during listing photography and shipping. Sealing prevents lifting and keeps the surface looking intentional rather than worn.
Keep interior embellishing minimal in twine binding journals. This is the one that trips people up the most when they're transitioning from making personal journals to making sellable ones. If the signatures are thick with layers, the removable-page feature — one of the main things that makes twine binding special — stops working properly. A few stamped pages, a pocket, a journaling card: enough to give the journal character and inspire the buyer, not so much that the pages won't slide.
Use original pages, not photocopies. If you're adding pulled quotes or printed text from a book, tear out the actual page and use it. Photocopying published text to use in items you sell is a copyright problem. The original page is also nicer — the font, the paper age, the margins all feel right in a way a photocopy doesn't quite match.
I'm planning a dedicated binding tutorial that goes through exactly that, so if the flip-through here gave you a sense of where these journals can go, the binding tutorial will give you the method to get there yourself.