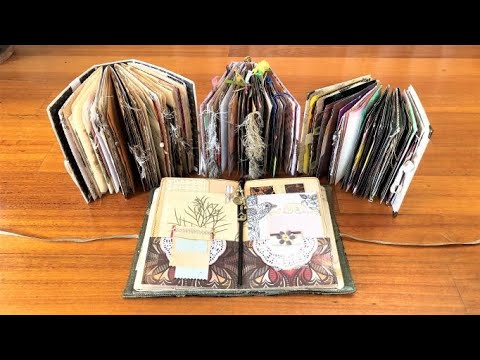
If you've got a stack of birthday cards, anniversary cards, or other sentimental cards sitting in a drawer — and you want to bind them into a keepsake without losing the written messages inside — this tutorial is exactly what you need. The whole method uses no glue, just two holes per card and a single length of thread, and it keeps the front of each card paired with its message rather than burying everything at the back.
What we cover
This tutorial walks through a simple two-hole no-glue binding for greeting cards, including how to measure and prepare your cards, how to work the binding stitch from the first card through to the last, and how to finish the spine — with options for adding beads, ribbon, and other decorative elements. I also cover what to do if you run out of thread mid-project, and how to fix a binding that ends up looser than you'd like.
What you'll learn
How to prepare your cards for binding, including:
- Deciding on your stack order and whether you want cards centered, staggered up, or staggered down
- Using your shortest card as a piercing template so all holes land at the same level across every card
- Making a separate template from a book page if you'd rather not use a card directly
How to measure thread length — use your tallest card as the unit and multiply by double the number of cards, then add a little extra. If you have six cards, you need twelve lengths. A bit more for luck never hurts.
Why I wax my thread for this project — with such a long working length, unwaxed thread tangles, drags, and generally misbehaves. A quick pass over a block of beeswax (or even a candle) makes it stiffer, smoother, and much easier to pull through card-stock holes cleanly.
How the two-hole binding stitch works, including:
- Always starting on the inside of the very back card, bottom hole first
- Why every card in the stack (except the very first and very last) ends up with two threads on the inside and one on the outside
- How to attach each new card to the previous one by going under the spine thread and tying a knot
- The correct finishing sequence — going back inside through the final hole and tying off under the inner threads
How to tighten thread without ripping through the card — always pull away from the project, never up or down. This is the single most important technique habit in the whole binding, and I show what happens when you forget it.
How to start a new thread mid-project — finish off the current card exactly as you would finish the whole binding, then start fresh with a new knotted thread, attach it to the previous card's spine thread, and carry on. No need to plan the whole project around one enormous length of thread.
How to add a tightening string if the finished binding feels loose — thread a separate string under all the spine threads from top to bottom, pull snug, and tie off. It brings everything in closer without undoing any of the binding.
How to decorate the spine, including:
- Threading beads onto a tightening string between the spine cords
- Beading as you bind — adding beads directly onto the working thread so they sit as part of the binding itself
- Adding sari silk, ribbon, or washi tape strips for a fringed or layered look
- Mixing bead types (gold beads, paper beads, hand-rolled beads) for a more textured result
Why this binding works for more than just cards — envelopes with the bottom slit open to create a pocket, cardstock folios, mixed stacks of cards and card-stock inserts. The method transfers to anything that has enough body to hold a clean hole.
Tips & gotchas
Use your shortest card as the piercing template. If the holes aren't all at the same height across the stack, the binding pulls unevenly. One misaligned card will throw off everything above it.
Double your starting knot. Tie a knot, then tie another knot right over it. You want enough bulk that it won't slip back through the hole while you're working with the long tail.
Wax your thread twice if you're uncertain. I do it twice every time. It's not OCD — a waxed thread runs through holes smoothly and doesn't bunch or twist when you're pulling through multiple cards in sequence.
Practice on book pages or cereal box scraps before touching your actual cards. Once you've done the sequence two or three times on something disposable, the rhythm becomes obvious. It's genuinely one of those things that clicks as soon as your hands have done it once.
Pull away from the project to tighten — always. Pulling downward is how you make rips. If a small rip does happen, don't panic: going around the hole twice and tying the knot as usual will hold it. A small tear doesn't ruin the binding. A large one is harder to recover from, so go slowly around problem spots.
Flimsy paper won't hold up to this binding on its own. Computer paper and thin pages need to be part of a full chunky signature to have enough body. Card stock and card-weight envelopes work beautifully.
You can take a break mid-project. Finish attaching the current card, tie the knot, set it down. When you come back, you just pick the next card off the pile. There's no awkward mid-stitch moment to navigate.
If the binding feels loose when you're done, add a tightening string. Thread a new length under every spine cord from top to bottom, pull it snug, and tie off at each end. It's a clean fix and you can add beads to it at the same time.
Beads threaded onto the tightening string, paper beads rolled to match the card colours, a length of sari silk tucked in for fringe — none of this requires a wide spine or extra hardware, just whatever's sitting on your craft table. And because this is a keepsake rather than a writing journal, the beads and ribbons aren't in anyone's way. The cards stay in order, the messages stay paired with their fronts, and the whole thing holds together without a drop of glue. That, to me, is the quiet pleasure of this kind of project.