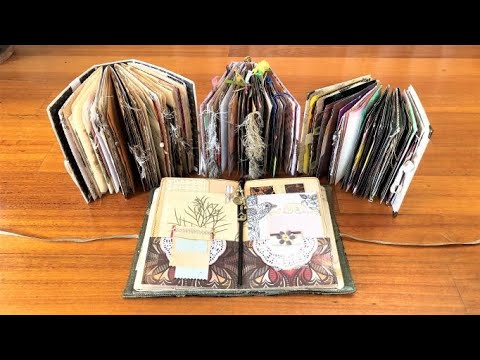
If you've got a hot glue gun and some cardboard, you can create a richly textured journal cover that looks like it belongs in a museum of dark and metallic art. This tutorial shows exactly how — using hot glue to build raised texture, tissue paper to capture every fold and wrinkle, and layers of black, brown, and gold acrylic paint to bring it all to life. It's also part one of a two-part Coptic stitch binding series, so by the end you'll have a finished cover and prepared signatures ready to go for the binding tutorial.
What we cover
The tutorial walks through the full process of making a textured book cover — from drawing hot glue patterns onto cardboard, through layering and gluing tissue paper over the dried texture, to painting in black, brown, and gold. The second half covers finishing the cover inside and out (including attaching a handmade bookplate with brads), then preparing and sizing tea-dyed signatures for Coptic stitch binding.
What you'll learn
How to build hot glue texture on a cover base — freehand patterns of dots, swirls, circles, and beads of glue on cardboard or any surface you like. The pattern is entirely yours to decide; the technique works on canvas, thick card, or anything sturdy enough to hold the glue.
How to apply tissue paper over hot glue texture to create surface depth, including:
- Using thin tissue paper in multiple layers for subtle texture
- Using thicker tissue paper for more pronounced folds and wrinkles
- Scrunching and pressing tissue into wet PVA glue to capture crinkle and dimension
- Wrapping and gluing excess tissue over the edges for a clean finish
How to mix PVA glue for the right working consistency — approximately 2/3 glue to 1/3 water, runny enough to saturate tissue paper fully without fighting it.
How to paint a dark and metallic cover in stages, including:
- Starting with a full coat of black acrylic paint to unify the surface
- Sponging brown acrylic paint over black so the darker colour shows through
- Applying gold paint with a brush, a sponge, or a fingertip — each gives a slightly different deposit and reach into the texture grooves
- Using a specialty product like antique gold rub-and-buff to pick out the most raised elements — the hot glue dots especially
How to recover from too much gold paint — dab darker paint over the blob, let it settle, then blend gold back over it. The layered nature of this technique means there's almost nothing you can't fix.
Why the painting sequence matters — black paint first, then colour accents, means you're always adding warmth and never losing the dark base. Acrylic paint also reinforces the tissue paper as it dries, stiffening any raised or fragile spots.
How to finish the inside of the cover, including:
- Attaching a handmade bookplate with a combination of glue and brads for security
- Lining the back panels with coordinating scrapbook paper, inked at the edges, for a clean interior
How to prepare signatures for Coptic stitch binding, including:
- Cutting pages slightly smaller than the cover using a cardstock template
- Folding pages in half and assembling them into signatures
- Sizing signatures so there's a small margin at the top and bottom, with the pages sitting just slightly wider at the opening edge
Tips & gotchas
Leave a clear strip along the spine edge before you apply hot glue. For Coptic stitch binding, the stitches are visible on the cover — you don't want to be pushing a needle through thick dried glue. If you're making artwork rather than a bound journal, this obviously doesn't apply.
Remove hot glue strings before you apply tissue paper. The strings aren't bonded firmly to the surface, so if they're left in place they'll sit under the tissue and create air pockets. The easiest way to deal with them is a coarse brush — just sweep across the surface and most of them lift straight off. A heat gun or hairdryer will melt the finer ones.
Thicker tissue paper gives noticeably more texture than thin. If all you have is the thin kind, use multiple layers — it does work, but you'll be fighting it more. Thick tissue paper practically wrinkles itself as you press it into the glue.
If you're using thick paper or even fabric as your covering layer, a light spray of water before applying it helps it relax and stick down cleanly.
Dry your pieces elevated — propped on a little stand or can so the wet edges aren't touching the surface. Flat-drying leaves marks and can cause uneven bonding at the edges.
Expect warping, especially with thinner cardboard bases. Don't worry about it mid-process. Once everything is completely dry, flatten the piece under something heavy and it will come back into shape. You can also just flex it gently with your hands — there's more give in the dried piece than you'd expect.
With paint, start with very little on your brush or sponge. It's easy to add more; it's not easy to remove it. Building up slowly gives you much better control over where the gold catches and where the dark base stays visible.
Seal the finished painted cover if you want to be safe — acrylic paint can become slightly tacky against other surfaces over time, especially if stored in contact with paper or fabric. If you don't have a dedicated sealer, the piece will likely be fine anyway; just know the option exists.
For the signatures: three to five pages per signature is the sweet spot for Coptic stitch binding. More than that and the binding process gets awkward. Five signatures of five folded pages each is exactly what's used in this project — a manageable stack that sits well against the cover size shown here.
That's the thing about this process: once you know it, you'll find yourself reaching for it on all kinds of projects, not just journals. The combination of hot glue raised texture, tissue paper wrinkles, and a dark-and-gold paint finish produces something that genuinely looks much better in person than it photographs — which, honestly, is the best kind of thing to make.