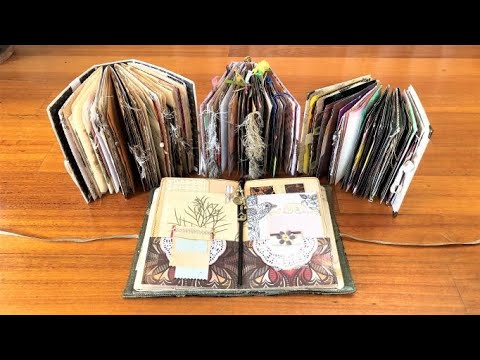
If you've ever wanted a book that opens completely flat — no holding the spine down, no losing your place — Coptic stitch binding is the technique that makes that possible. In this tutorial I walk through the full process from preparing covers and signatures all the way to tying off the final knot, with written steps on screen throughout and a downloadable instruction sheet linked in the description. The exposed spine is part of the appeal: those little braided stitches along the outside are a design feature, not an afterthought.
What we cover
This is a complete Coptic stitch binding tutorial — preparing a hole-piercing template, assembling signatures and covers, working through the stitch sequence (including the cover loops and the signature-to-signature loops), handling thread tension, and finishing the last signature. I also show how to continue if you run out of thread mid-binding, and I bind two different books so you can see the process at demonstration pace and then again at working pace with a curved needle.
What you'll learn
How to make and use a binding template — a folded scrap of paper the same height as your signatures, marked at the top so every hole lands in exactly the same position across all signatures and covers. Getting this right is what keeps the braid straight rather than curved.
How to decide on station placement — stations are simply where your holes (and therefore your stitches) will sit. You choose how many stations you want and how they're spaced; a book with four stations looks different from one with seven, and the spacing can be even, clustered toward the ends, or anything in between.
How to pierce holes cleanly through signatures and covers — using an awl or any piercing tool you have, working on a soft surface, and optionally marking with a tack before piercing. I also show neatening the holes on the inside with something flat, which makes threading easier later.
How to calculate thread length — if you want to bind with a single continuous length: measure the height of your book once, then multiply by the number of signatures plus covers. Five signatures and two covers means seven heights. I tend to cut a little more than I need and end up with surplus, but that's easier to manage than running short.
The core Coptic stitch sequence, including:
- Starting inside the first signature, threading through the top hole, and wrapping around the outer edge of the back cover
- Looping under the cover stitch left to right before returning through the same hole
- Moving through subsequent holes and repeating the cover-wrap loop until the last hole of the first signature
- Picking up the next signature, entering through the corresponding hole, and shifting to the signature-to-signature loop
- Looping right to left under the previous stitch when working between signatures (as opposed to left to right at the cover)
- Picking up both the last signature and front cover together and working through the finishing sequence
Why loop direction matters — left to right at the covers, right to left everywhere else. It sounds like a lot to track when you're learning, but the logic becomes instinctive quickly. After a few practice runs you won't need the notes at all.
How to continue if you run out of thread — tie a double knot, trim the old thread, start a new length from a knot, and carry on from the next hole. The knots sit inside the book. It does interrupt the visual continuity of the braid on the inside, but it's a clean and perfectly solid fix.
What good tension actually feels like — tighten until you feel the thread stop, then leave it. Over-tightening pulls the book into a gape; too loose and the spine has no structure. The goal is a spine where the braids are firm but the book doesn't spring open when you set it down.
How to add gilded page edges as a finishing detail — for the second book I painted the page edges and the spine to match the gold of the cover, then added touches of gold paint through the interior pages. It's a small step that ties the whole book together visually.
Tips & gotchas
Mark the top of your template before you pierce a single hole. It takes two seconds and it means you can't accidentally flip the template and end up with holes at different heights across your signatures. A small "T" in pencil is enough.
Do a practice run before you bind anything precious. Cereal box scraps cut to signature size are perfect — you get the muscle memory of the looping steps without risking a book you've spent hours decorating. I'd especially suggest this if you're working from a prepared art journal: practice on throwaway materials first, then commit to the real thing.
Start with a smaller project rather than a large, fully prepared book. The stitch itself isn't hard, but coordinating the needle, thread tension, and signature positioning all at once takes a couple of passes to feel natural. A small book with four stations teaches you everything a large one does.
Tighten until you feel the thread stop — and then stop tightening. A book bound too tightly will gape open at the spine like an alligator jaw. If you see that happening, the binding tension is the first thing to look at (though heavily tea-dyed pages with a lot of wrinkling can also cause a small amount of gape, so consider the paper too).
Before you tighten at any station, bring the signature into its final position first. The signature can shift around while it's loose; if you tighten before it's seated correctly you'll pull it slightly out of line.
A curved needle makes the looping steps noticeably easier and quicker — especially when you're looping under stitches in the middle of a thick book. You can absolutely do it with a straight needle (I demonstrate with one), but if you find yourself struggling to get the needle under and back out cleanly, try opening the cover and looping from the inside instead.
Waxed thread is more forgiving than embroidery floss. Embroidery floss has six separate strands that can split when you're looping, which frays the stitch and makes the braid look untidy. If waxed thread isn't available, yarn or twisted twine both work well. The gold thread I use for the second book is beautiful but not the easiest to handle — pretty is sometimes worth the extra fiddling.
Don't stress about getting the loop direction perfectly consistent while you're learning. Left-right, right-left — if you get it backwards once it isn't going to unravel the book. The direction matters for the visual consistency of the braid, and it will start to feel automatic once you've done the stitch a handful of times.
It pairs beautifully with decorated covers, painted or gilded page edges, hand-dyed papers, and all the layered materials that deserve to be shown off rather than tucked inside a closed binding. The same stitch scales from a small pocket journal to a large art book; the logic doesn't change, just the number of signatures. If you're already working on covers and paper preparation, this is the binding that brings all of those elements together into something you'll want to keep making.