Tunnel books are one of those projects that look more involved than they are — and once you've made one, you'll want to make ten more. In this tutorial I walk through the full process of making a layered, 3D tunnel book from scratch: choosing your pages, cutting the graduated openings, hinging everything together, covering the spine, and embellishing each page so the depth really comes alive when you look through it. If you've ever wanted to make a handmade gift that's genuinely personal and interactive — something a photo album or a card just can't do — tunnel books are worth knowing how to make.
What we cover
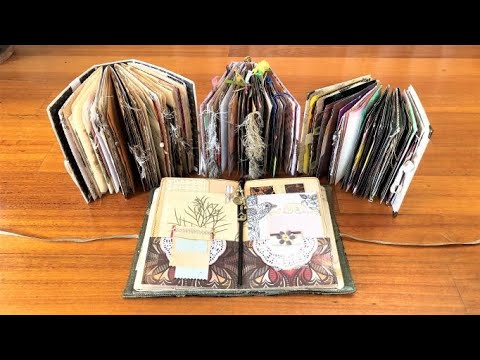
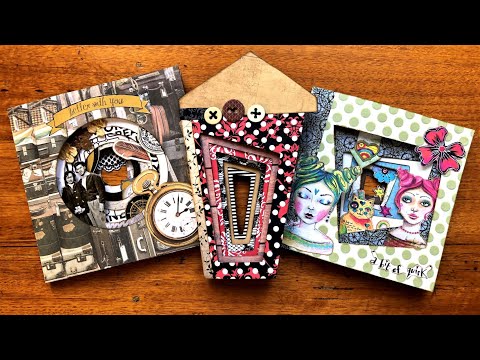
Starting from a blank stack of paper through to a finished embellished book, this tutorial covers every stage of tunnel book construction: page selection, opening shapes and cutting order, the hinge binding method, spine covering, and embellishing with layered die cuts, paper flowers, butterflies, and bling. I also show several finished examples so you can see the range of what's possible before you start your own.
What you'll learn
What a tunnel book is and how the layered structure works — a tunnel book creates a 3D scene through a series of pages with graduated cutouts, each opening smaller than the one before it. That progression is what creates the tunnel illusion when you look through from the front.
How to choose and arrange your pages, including:
- Using a 6×6 paper pad or any size you have on hand — the size doesn't matter
- Why double-sided paper is worth reaching for so both faces of each page show pattern
- Deciding on the number of pages (I use five for most of my books, but you can do more or fewer)
How to decide on your opening shape and cut it, including:
- Circle openings (using a circle punch, compass, or any round template you have)
- Square and rectangle openings
- Ripped openings — torn freehand, giving a rough organic edge that I genuinely love
- Asymmetrical shapes, where no two openings match — the easiest option because you don't need them to align precisely
- Using the page before as a template: slip the next page underneath the one you've already cut and you can see exactly where to go smaller
Why the first page always has the largest opening — and how each subsequent page gets progressively smaller to build the tunnel effect. If the order gets reversed, the illusion collapses.
How to hinge pages together with paper strips, including:
- Cutting strips to approximately 1.5 inches (about 4 cm) wide, the same height as your book
- Scoring and folding each strip in half lengthwise with a bone folder for a crisp hinge
- Using washi tape as a hinge alternative (just apply glue over the tape to secure it)
- Why I prefer glue over double-sided tape — it's personal preference, but both work
How to construct and cover the spine, including:
- Scoring two lines on the cover strip (one for each side of the spine thickness) so the book opens and closes with real movement
- Why you should leave the spine itself unglued — no adhesive directly on the spine keeps everything flexible
- Rounding off any overhang on the strip if the spine is narrower than your strip
How to embellish page by page to build a story through the book, including:
- Laying everything out first without gluing to see the full composition before committing
- Working with the book closed so you can see how elements appear through the opening
- Using just one or two elements per page — restraint is what makes the depth readable
- Placing larger pieces on the front pages (bigger openings, more room) and smaller pieces further back
- How inking edges with distress ink adds depth and reinforces the 3D effect
- Theme ideas: Alice in Wonderland, vintage, steampunk insects, family photographs, birds, botanical — or just collecting from whatever you have on hand
How to leave a tunnel book unembellished as a gift — if you're making this for someone else's journal practice, leaving the pages blank lets the recipient tell their own story.
Tips & gotchas
Leave enough margin at the spine edge when you cut your openings. If your opening runs too close to the hinge edge, the hinge strip will be visible through the cutout when the book is open — I did this on my demo book and had to trim the hinge down to compensate. Give yourself more space than you think you need.
Never glue directly onto the spine. The whole point of the scored spine strip is to allow movement. If you glue the spine itself, that movement disappears and the book becomes stiff and awkward to open. Apply glue only to the side flaps of the hinge strip, not the spine fold.
Check for glue seeping through while it's still wet. On my demo book I lifted a page and found glue had gone right through to the next page. Catch it before it dries — once it's set, you're stuck with it (literally).
Open each page while the glue is still wet. Give the hinges a flex before everything sets. It helps prevent stiffness and starts working the movement into the book from the beginning.
When gluing embellishments, watch where the piece sits in relation to the opening. If any part of an embellishment overlaps the open cutout area and you apply glue there, it will stick to the page behind it. I apply glue only to the parts of the piece that sit on solid paper — and check which parts those are before I apply anything.
Draw your shape before cutting if you want consistent openings. For circles especially, using a compass to find the center of the page and drawing the shape first gives you much cleaner, more controlled results than cutting freehand.
If you're using ripped or asymmetrical openings, don't stress about alignment. The freedom in not matching shapes exactly is part of what makes that style work. The eye fills in the rest.
Embellish with a unified source if you can. On one of my finished examples, all the little die cuts came from a single themed book — and the result looks cohesive and rich almost effortlessly. When you're pulling embellishments from several different packs, it takes more time to get everything to work together. Not a dealbreaker, but worth knowing before you start.
They also sit beautifully slightly open on a shelf, which means they live as little pieces of art rather than just sitting flat in a drawer. The technique pairs naturally with anything you're already doing in paper crafting: journaling, scrapbooking, bookbinding — the same papers and embellishments you already have will do the job.