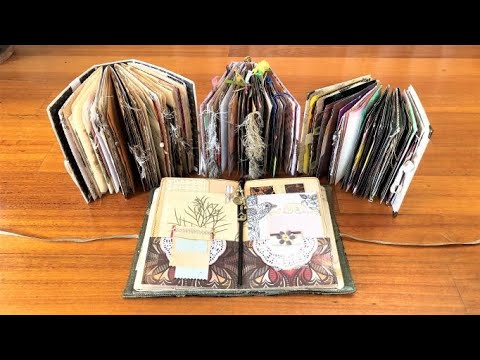
If you've been saving empty pen barrels and wondering what to do with them, this tutorial shows exactly how to put them to work. I use a gutted book cover — one I picked up at a garage sale for fifty cents — and a signature of twenty mixed pages to walk through a no-sew journal binding where empty pen barrels hold everything together. The pages stay removable, the journal lays flat, and nothing goes in the bin that doesn't have to.
What we cover
This tutorial covers binding a junk journal using empty pen barrels threaded through the spine — no needle, no sewing the signatures in. Along the way I walk through five different ways to decorate the barrels, show how to prep and roll paper inserts, cover a fabric spine, and finish the cover with handmade embellishments.
What you'll learn
How to cover a salvaged book spine with fabric — using a thin layer of Elmer's clear glue to attach a cut-to-size piece of fabric that hides the gutted spine, protects the end pages, and keeps the whole structure tidy. The key is using the thinnest possible glue layer so nothing seeps through the fabric or warps the paper underneath.
How to prepare a mixed-page signature for pen-barrel binding, including:
- Folding and collating tea-dyed pages, book pages, draft paper, scrapbook paper, and coloring pages together
- Adding machine-stitched pockets at the signature stage, before binding — easier now than trying to do it after
- Understanding why removable pages are one of the quiet advantages of this binding method
How to check your pen barrel before you start — not all pens are open on both ends. Some are sealed at one end and simply won't work. I show how to check, how to remove the rubber grip and end cap, and what to look for before you commit a pen to the project.
Five ways to decorate pen barrels, including:
- Leaving clear barrels as-is with a decorative thread wrapping alongside
- Wrapping with washi tape (with a specific diagonal technique to avoid ridges — more on this in Tips)
- Wrapping with fibers, ribbons, trims, or fabric for a boho look
- Rolling a piece of scrapbook paper or a book page and inserting it inside the barrel
- Combining a rolled paper insert with a small strip of washi tape at the end
How to roll paper inserts for pen barrels, including:
- Cutting the paper to the exact height of the barrel
- Why thinner paper works better — and how a light mist of water makes thicker scrapbook paper pliable enough to roll without hard creases
- Rolling around a wooden skewer for a uniform, controlled tube
- Trimming down to about an inch of paper — you don't need the full sheet
- The happy accident of a spiral twist as you push the roll in, which hides the seam line and actually looks better than a clean roll
How to thread and bind the signature with a pen barrel, including:
- Wrapping thread around the center fold of the signature and leaving extra length for beads or embellishment
- Threading the wrapped signature through the pen barrel from one end to the other
- Tying the knot as tightly as possible, then pushing it up before tying a double knot
- Checking tightness by trying to wiggle the signature in the barrel — you want it snug, not shifting
Sizing the binding to the spine width — narrow spines take one pen barrel; wider spines (like a Reader's Digest) take two. I walk through how to find the center of each barrel position and how to run two separate threads for a two-signature wider spine.
Ways to finish the thread ends after binding, including:
- Threading them back inside the signature and clipping decorative tags onto them
- Adding beads along the thread ends for color and movement
- Leaving them plain if the overall decoration already carries enough
Adding a decorative embellishment to the cover — I use a handmade fabric bead and tassel piece (made in a separate tutorial I link at the end) and glue it directly onto the cover. The principle is the same with anything you have ready-made: try it, and if you don't like it, keep adding until you do.
Tips & gotchas
Save, don't sacrifice. Only use pens that are genuinely empty — don't destroy working ones just to get at the barrel. Once you start saving them you'll have more than you need faster than you'd expect.
Before you do anything else, check whether your barrel is open on both ends. Some pens are sealed on one side and there's no way to work around it — that pen just isn't usable for this project. Better to find out before you've glued a fabric spine around it.
With glue on the spine fabric, thin is everything. The clear glue I use is water-based, which means it will warp paper if you apply too much. A really thin, even layer on the fabric and just a touch on the sides is all you need. If it looks like enough, it's probably already too much.
For rolling paper inserts, thinner scrapbook paper rolls cleanly without help. Thick paper fights you — it wants to crease rather than curve. Spraying it lightly with water before rolling gives it enough pliability to cooperate. You only need about an inch of paper; trim the excess before you roll or you'll have far too much bulk to push into the barrel.
The washi tape wrapping trick took me one messy pen barrel to figure out. If you wrap straight up the barrel like you might instinctively want to, you get washi tape standing up at the edges, and then when you press it down you get ridges. Instead: start with one small straight piece at the very bottom, then switch to wrapping diagonally — sideways along the barrel — for the main length, and finish with one straight piece across the top. It's quicker, cleaner, and the surface stays smooth.
Add a small dot of glue at the start, somewhere in the middle, and again at the end of your washi wrapping. Washi tape on a round surface will peel eventually if you don't anchor it; a little glue at those three points holds it permanently. If you're using multiple shorter strips of washi rather than one long wrap, glue every piece.
When you tie the binding knot, make it as tight as you possibly can — tighter than feels natural. Tie it, push it up toward the barrel, then tie a double knot. The test is to hold the journal and try to wiggle the signature back and forth. If it moves, the knot needs to be tighter. A little snugness at the knotting stage means the journal stays usable and doesn't loosen over time.
One last thing about the pen barrels in use: it looks like they'd get in the way when you're writing in the journal, especially once you open it to the middle. In practice they just move to the side and the pages still sit flat. I always worry about things on spines interfering with the pages — this one genuinely doesn't.
The binding itself is just thread and a hollow tube, which means almost anything cylindrical and open on both ends is a potential starting point. The journal I made for this video used a book-page insert in the barrel and a handmade fabric bead cluster on the cover, and it came together in well under an hour — which is roughly what this kind of binding is for.