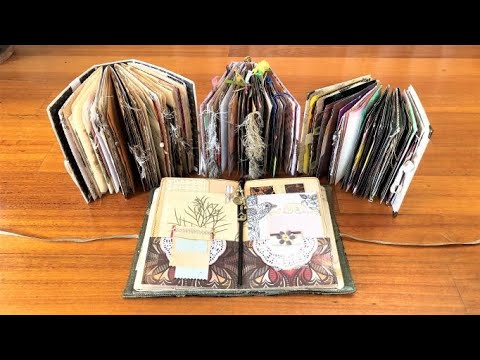
If you've been looking for a handmade gift you can actually finish in an afternoon — or a small sellable item for a craft fair — this tutorial is exactly that. I'm making three sizes of DIY sketchbooks using Japanese stab binding, tea-dyed paper, fabric-covered fronts, and whatever embroidery floss or twine catches my eye. The whole approach came from a little booklet my daughter made at school when she was eight years old. I kept it for years, and it finally became this.
What we cover
Three sizes of hand-bound sketchbook — large, medium, and small — made from tea-dyed or coffee-dyed paper with cereal box covers, fabric-frayed front pieces, and Japanese stab binding using embroidery floss, twine, or baker's twine. I also show how to make a reusable hole-punching template, how to space holes evenly without guessing, how to add hole reinforcers (including making your own with a circle punch), and how to attach charms using jump rings. By the end, I've made nine booklets across the three sizes — two made the previous afternoon, the rest filmed that day.
What you'll learn
How to make a reusable hole-punching template from cereal box cardstock, including:
- Cutting it to exactly the width of your pages so alignment is automatic
- Marking a consistent distance from the spine edge (around 1–1.5 cm works well)
- Using the template across small batches so your holes stay in roughly the same position on every page
How to space holes evenly across any page width — divide the total usable width by the number of holes plus one. Six holes means seven spaces, so you divide by seven. I walk through this in both centimetres and inches, because choosing the unit that gives you a cleaner number makes the arithmetic much easier.
How to punch holes cleanly across a full stack of pages, including:
- Working in small batches (around five pages at a time) rather than trying to punch everything at once
- Stacking punched batches face-down in order so you don't lose page sequence
- Why cardstock templates are easier to use than paper ones — you can feel when the punch is seated in the hole
How to apply and reinforce hole reinforcers — the pre-made adhesive rings from office supply stores, or handmade ones punched from scrap paper using a circle punch and a smaller punch for the centre. The adhesive backing on commercial ones doesn't last forever, so I add a small dab of glue under each one before it goes down.
The full Japanese stab binding sequence for both six-hole and four-hole layouts, including:
- How to start from the back hole and secure your thread tail temporarily with low-tack masking tape
- The first pass: going over the top of each hole and filling the front-to-back sequence
- The return pass: adding the second thread strand on each hole and filling the gaps between
- Hugging the outside edges at both ends to create a clean finish
- How to finish with a double knot (and optionally a small dab of glue) at the back
How to make a fabric-frayed front piece, including:
- Gluing your image or collage element onto burlap before sewing
- Machine sewing around the piece so fraying stops at the stitch line
- Cutting the outer edge with a slight wiggle rather than a straight line for a more organic finish
Why the front piece has to be finished before you bind — if you want to machine sew around your cover image, or add any technique that requires the front page to lie flat and separate, it has to happen before binding. You can't go back.
How to attach charms to a finished booklet using jump rings — thread a jump ring under the two binding strands at the spine end, attach your charm (a vintage piece of broken jewellery, a small heart, whatever you have), and close the ring. It sits flat and doesn't interfere with opening the pages.
How thread choice changes the look — I use red embroidery floss on one, baker's twine on another, and steel-grey embroidery floss on the smallest. Each reads quite differently. The contrast between thread colour and paper colour is worth thinking about before you cut your length.
Tips & gotchas
Use cardstock for your hole-punching template, not regular paper. When you press the punch down, a thicker template lets you feel when the tip is seated inside the hole rather than sitting next to it. It's a small thing that saves a lot of misaligned holes.
Glue your cover image onto the burlap before you sew. I do this even though I'm stitching all the way around the edge — because the stitching only catches the perimeter, and the middle section needs to be adhered too. Without glue, the centre lifts.
On hole reinforcers: the sticky backing loses grip over time, especially on papers with any texture or sizing. I put a small dab of glue under each one as I apply it. Takes seconds and it holds.
When you finish binding, tie a proper double knot and pull it tight before you cut the thread. A dab of glue over the knot is optional, but if you're making these to sell or give, it's worth doing. I often skip it on my own, but I wouldn't skip it on a gift.
For batch production, punch in small groups and stack each punched batch face-down immediately. If you're using patterned or varied papers and the sequence matters, this is how you keep it. Even if all your pages are the same, building the habit means you won't lose order when it does matter.
Plan your cover decoration before you bind. Machine sewing, stencilling, sewing around a front piece — all of these need to happen while the cover page is still free. Once the booklet is bound, that window is closed.
To divide holes evenly: total usable width ÷ (number of holes + 1) = the spacing interval. Mark from one end and space accordingly. I prefer centimetres when the numbers divide cleanly — 14 ÷ 7 is a lot friendlier than 5.5 ÷ 7.
When you're taping down your thread tail at the start of binding, use masking tape that's already lost a little of its stickiness — or press it to your hand a couple of times first. You're peeling it off a finished page later, and you don't want to lift the surface.
Once you've made one or two of these, the binding sequence clicks and the whole booklet comes together quickly. The first one is the slow one. After that, you can genuinely batch a set of these in an afternoon.
The same binding works on thicker paper stacks if you want a chunkier sketchbook, and once you're comfortable with six holes you can scale up to eight or more for a denser pattern on the spine. Tea-dyed and coffee-dyed papers give everything a warm, cohesive look, but the same structure works just as well with bright, colourful pages — or a mix of both.