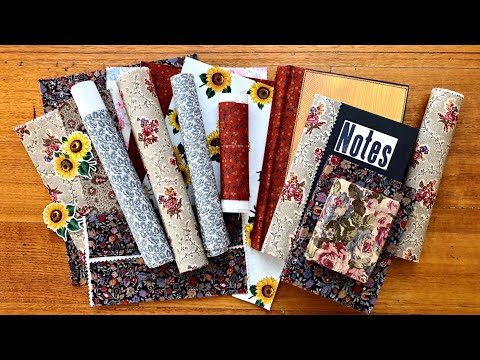
If you've been covering books with plain fabric and ending up with air bubbles, glue bleeding through the weave, or fabric that just won't sit flat — this is the video that explains why, and what to do instead. I walk through seven different ways to make DIY book cloth at home, using materials most crafters already have, and then show exactly how to use each type in real projects: covering a spine, wrapping a full hardcover, and making small journal inserts like pouches and envelopes.
What we cover
This tutorial covers what book cloth actually is and why it works better than bare fabric for book covering, followed by seven hands-on methods for making it yourself — using cling wrap, double-sided tape, freezer paper, PVA glue, heat and bond adhesive, fusible interfacing, and fabric glue. The second half shows book cloth applied to real projects: spine covering with bone folder and grooves, full book covering with corner wrapping, and spine reinforcement on the inside.
What you'll learn
What book cloth is and why it works differently from bare fabric — book cloth is fabric that's been bonded to a paper backing, which prevents the three main problems that come up when you glue plain fabric to a book: air bubbles, glue seeping through to the front face, and wrinkling. The backing also stiffens the fabric just enough to make it easy to cut, fold, and work into spine grooves.
How to make book cloth with cling wrap (glad wrap), including:
- Laying fabric wrong-side up, placing cling wrap on top, then covering with thin paper before ironing
- Why you must never let the iron touch the cling wrap directly — it will bond to the iron
- How the melted cling wrap acts as a heat-activated adhesive between fabric and paper
How to make book cloth with double-sided tape, including:
- Using wide heavy-duty double-sided tape for a one-step bond with no drying time
- Cutting strips for narrower applications
- Honest tradeoffs: adhesive can seep through over time, and the bond can weaken — best treated as a quick, practical option rather than an archival one
How to make book cloth with freezer paper, including:
- Ironing the shiny (plastic-coated) side of freezer paper directly onto the wrong side of fabric
- Using unbleached freezer paper rolls for both fabric and napkins
- Why this method peels off easily — and why that matters for how you use it
How to make book cloth with PVA glue, including:
- Painting a sheet of paper with PVA, laying fabric on top, smoothing it out, and allowing it to dry fully
- The warping problem: paper and fabric both expand and contract unevenly as the glue dries, leaving a buckled surface — ironing afterward flattens it, but it's extra work
- Why this method produces a very strong bond despite the difficult drying process
How to make book cloth with heat and bond (fusible web), including:
- Ironing the adhesive sheet onto the wrong side of the fabric, then peeling away the paper carrier
- Placing your chosen paper backing on top and ironing again to bond
- Using tissue paper or thin Japanese paper as the backing for more pliable results
How to make book cloth with fusible interfacing, including:
- Ironing the glue-dotted side of the interfacing directly onto the wrong side of the fabric
- Why this is the most pliable of all the methods — and why that matters when you're working cloth into tight spine grooves
- Why I consider it the best all-round option for covering full hardcover books
How to make book cloth with fabric glue, including:
- Painting fabric glue (not watered-down PVA) directly onto paper, then pressing fabric on top and smoothing flat
- Why skipping the water reduces warping significantly compared to diluted PVA
- The tradeoff: strong adhesion and a flat result, but the application process is slow — practical for small pieces, less so for covering a full large book
How to cover a book spine with book cloth, including:
- Peeling back the backing on double-sided tape cloth gradually rather than all at once, for better control
- Using a bone folder to press fabric into the spine grooves on both sides
- Folding the cloth to the inside, gluing, and reinforcing the interior spine with a trimmed piece of cardboard covered in fabric
How to cover a full hardcover book with book cloth, including:
- Cutting cloth approximately an inch larger than the book on all sides
- Applying glue into the grooves and across the panels, then working the cloth in with a bone folder
- Cutting the cloth into a small point at each spine groove before gluing, to prevent puckering
- Wrapping and gluing corners cleanly before folding in the sides
- Covering the interior spine panel with a separate piece of book cloth using a bone folder to seat it in the groove
When to use each method — a practical summary of which cloth type suits which project: interfacing for full book covering, double-sided tape or interfacing for spines, PVA glue cloth for pouches and envelopes, freezer paper for fussy-cutting and pages (with sewn edges), and cling wrap cloth as a flexible option across all uses.
Tips & gotchas
Never let the iron touch the cling wrap directly — even for a second. It bonds to the sole plate immediately and is a pain to clean off. Keep the paper layer fully covering the cling wrap before you iron.
Use thin fabric for book covering. Upholstery or thick quilting fabric can work beautifully for pouches and decorative elements, but when you need that cloth to flex into a spine groove and lie flat inside a book, thin fabric is what allows it. Thick fabric bunches and fights back.
On the same note, use thin paper as your backing. I found heat-and-bond cloth much harder to work into a small book's grooves than the freezer-paper version — and the difference came down to the thickness of what was behind the fabric. Tissue paper or thin Japanese paper (around 80 GSM or lighter) is what gives you a cloth that's stiff enough to hold but pliable enough to wrap.
With PVA glue, warping while drying is almost inevitable. Don't panic when it looks like a disaster fresh off the drying board — ironing it down flat afterward genuinely works. The key thing I learned: don't add water to the glue. I'd habitually thinned my PVA, and that extra moisture is what drives the worst of the warping. Fabric glue applied straight from the bottle warped noticeably less.
Always dry finished book covers under something heavy — a stack of books, a cutting mat with weights on top. The glue needs pressure to set fully and keep everything flush. Skipping this step is how you end up with lifting edges and uneven panels.
With double-sided tape book cloth, the two risks to know going in: the adhesive can eventually seep through lighter fabrics over time (just as it does on paper), and the bond can lose stickiness with age. For a spine that will also be held in place by sewn signatures and inner panels, this may not matter. For a surface that's exposed and load-bearing on its own, it's worth considering one of the more permanent methods.
Freezer paper cloth peels off easily — sometimes surprisingly easily. If you're using it as a journal page, a pouch, or any piece that will see handling, sew around all four edges. Glue alone won't keep it together.
When covering a full book, cut the cloth at least an inch larger on all sides, and cut small points into the cloth at the spine grooves before you start gluing those edges down. It looks odd at first, but it's what stops the fabric from puckering and pulling as you fold it in.
I've got a small pile of journals here waiting for signatures and signatures waiting for covers, and having a range of DIY book cloth on hand is what makes it easy to just pick up and keep going. The more you experiment, the more you start to see where each method shines.


