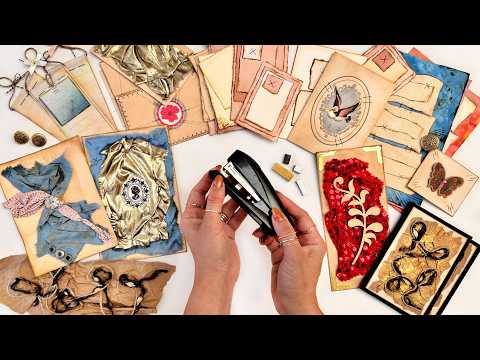
If you've ever looked at your stapler as nothing more than a practical tool for keeping papers together, this video might change how you see it entirely. I share ten ideas — some quick and easy, some satisfyingly fiddly — for using staples as genuine decorative elements in junk journals, art journals, cards, and paper crafts. The staple itself is the star: its shape, its texture, the way it holds and catches the eye.
What we cover
This is a roundup tutorial exploring ten distinct ways to use staples decoratively — from scrunching fabric and fiber art to beaded staples, paper piecing, doodled patterns, notepads with handles, tag toppers, and a few bonus ideas I didn't have time to fully develop but want to put on your radar. Along the way I show how coloring your staples with a Sharpie, mixing staple sizes, and thinking about where staple backs end up can make a real difference to the finished piece.
What you'll learn
How to color staples with a permanent marker — a simple step that transforms a silver staple into something that reads as intentional. I use a Sharpie and just run it over the top before I start. You can work in black, gold, or whatever suits the piece, and you can mix colored and plain staples in the same project.
How to create scrunched-fabric art held down with staples — my personal favorite in this whole collection. You scrunch up a piece of fabric (lightweight works best — anything too thick puts strain on the stapler), place it on a card stock backing, and staple it down as you go, working around the fabric to hold your scrunches in place. The result is something you genuinely can't replicate with glue or a sewing machine. I show this on a tea-dyed card stock base and work through layering options — one fabric, two fabrics, or more.
How to make beaded staples, including:
- Separating individual staples from the strip
- Threading small beads onto the staple — they need to fit past the bend so the staple can still close
- Poking holes in your paper first (the staple itself tends to bend if you try to push it through)
- Manually closing the prongs at the back once it's placed
This one takes patience, and I'll be honest — while I'm doing it, it doesn't always feel worth the effort. Once it's on the piece, it does.
How to use paper piecing with staples as the joining element — tearing or cutting paper strips and pieces and stapling them together with deliberate gaps between them, so the staple becomes part of the composition rather than hidden. Works especially well for pages where the paper is too dark to write on easily, and for creating a layered, sail-ship kind of feel.
How to build fiber art panels using twine, yarn, and other fibers stapled onto a scrunched-paper base — I show working with two different fibers (a thicker twine and a softer yarn), looping and twisting them, and stapling both the fibers and the loops in place. The key practical detail: work on a card stock backing first, then glue the finished panel onto a card or envelope so no staple prongs show through on the back.
How to make notepads with a handle — one of those ideas where the stapler really is the right tool. You stack and fold your paper strips, staple along the fold leaving a loop at the top, then thread twine or string through to form the handle. I show a simple knotted version and a twisted-twine variation with a small bow. The stapler creates the hold without the crease a sewing machine foot would leave.
How to make notepads from layered paper scraps — stacking pieces from largest to smallest, inking the edges so each layer reads clearly, and stapling them together. I use an X-pattern with two staples for a decorative effect; positioning the second staple in the groove left by the first helps keep them aligned.
How to use staples as a starting point for doodling and geometric patterns — placing staples across a piece of card stock and then using a ruler and pen to draw lines, dots, circles, or crisscrosses radiating from each staple. Meditative and genuinely beautiful at larger scale. Worth noting: your stapler can't reach the center of a large piece, so either plan to work from the edges inward or leave the center open as a focal point.
How to use staples for tag and pocket toppers — stapling a small decorative element straight onto a tag or page rather than punching a hole or sewing. If you staple first and then glue the piece onto your page, the staple backs stay hidden. If you staple directly through onto a page, you'll need to cover the backs — I used washi tape on one version.
A handful of bonus ideas I didn't fully develop, including:
- Drawing faces using staples as facial features (eyes, eyebrows) with pen lines connecting them
- Creating staple borders around a card or page
- Using staples as guidelines for journaling lines in an art journal
- Stapling through a collage or master board as a textural alternative to faux stitching
- Combining staples with lace instead of fabric for a softer variation on the scrunch technique
Tips & gotchas
Color your staples before you start. A permanent marker — Sharpie works well — takes seconds and makes the staples read as decorative rather than functional. You can match them to your palette or deliberately mix: black staples and gold staples in the same piece, or small and large staples together, read as intentional choices.
For scrunched fabric, lightweight is easier on your stapler. Fabric that's too thick can be genuinely hard to get through, especially with a standard stapler. If a fabric is shedding a lot (I had one like that — beautiful but relentless), it can actually work in your favor for this technique. Iron only lightly if at all — the unironed, textured version tends to look better.
For beaded staples, small beads are non-negotiable. They need to fit past the bend of the staple so you can still close it after threading. When you're manually closing the prongs at the back, go carefully — they're sharp, and fiddling with them while filming is even more precarious than usual.
For fiber art panels, work on a card stock backing. Staple through both the scrunched paper base and the card stock beneath it, then glue the finished piece onto a card or envelope. This way there are no visible staple backs and nothing pokey on the reverse side.
For pocket pages and tag toppers, do your stapling first, then glue. If you staple directly through to the page, you'll have visible (and potentially sharp) staple backs on the other side. Stapling onto the decorative piece separately and then gluing the whole thing down solves this cleanly.
Your stapler has a reach limit. Most staplers can't get to the center of anything larger than a few inches across. For the doodling idea especially, design with this in mind — working from the edges or leaving the center intentionally empty both work well as compositional choices.
The doodling technique in particular — using staples as anchors for geometric patterns across a larger piece — is something I'd love to spend a whole session on. And once you start seeing your stapler as a tool for fiber art, there's a real crossover with slow stitching and embroidery on paper that feels worth following. Any of the pieces here would fit naturally into a junk journal alongside inked edges, tea-dyed papers, and layered collage — the staples, oddly enough, belong.



