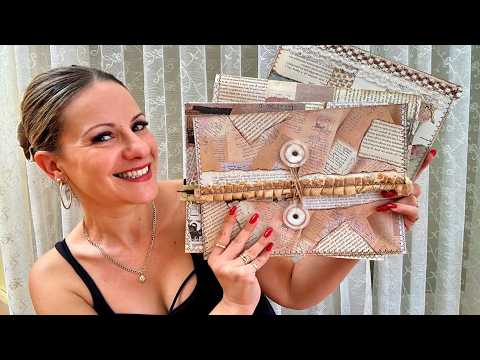
If you've ever finished a journal and wanted to send it off — or store it somewhere worthy — this tutorial is for you. I show you how to make large DIY pouches and envelopes entirely from scratch using book pages and whatever paper scraps you have on hand. Because we're building the structure ourselves rather than adapting a pre-existing folder or box, you can scale to any size you like: small enough for a deck of ephemera cards, tall enough to house a finished journal, wide enough for a whole collection of supplies.
What we cover
How to build a paper pouch or envelope from scratch — constructing and hinging the base from book pages, reinforcing it for durability, embellishing with collage, stenciling, sewing, and closures — and how to adapt the whole process to any size or paper you have available.
What you'll learn
How to build a pouch base from book pages (or any paper on hand), including:
- Joining and hinging individual pages to create a working canvas in any dimensions
- Deciding on size before you fold — and how to extend the canvas wider or taller by adding more pages
- Folding the pocket and flap, and why leaving a small gap between the pocket top and the flap fold matters
How to orient text and imagery so the inside of the pouch reads the right way up — glue your pages with the writing going the same direction, then flip the whole canvas upside down before you fold. Simple trick, easy to forget.
How to reinforce a flimsy base without covering all your lovely paper, including:
- Layering additional book pages or collage papers over specific sections rather than laminating the whole surface
- Using masking tape along folds and edges — it reinforces and looks great peeking out here and there
- Holding the piece up to the light to spot any sections that are still thin and need another layer
How to collage and embellish the surface, including:
- Using black-and-white images from old books (firefighter manuals, gardening books, encyclopedias) as focal points on the front, flap, and inside
- Layering tissue paper and tea-dyed papers for texture — very fine papers smoosh down beautifully and show the base through
- Stenciling in seconds using a single repeating stencil to tie multiple pieces together
- Scrunching masking tape or water-activated canvas-stretching tape over bold elements to push them back into the background and create a smoky, aged effect
- Adding thread, embroidery floss, twine, lace, yarn, paper ruffles, washi tape, postage stamps, and beads as surface details — in any combination, stapled or stitched down
How to use gesso to tone down areas that aren't working — when a section is too bold or a collage element isn't landing, a quick pass of gesso pulls it back without covering it entirely.
How to add a closure, including:
- A brad with twine wrapped around it — simple, strong, and keeps the flap flat
- A button or brad with layered circles of paper, all held down together
- Why longer flaps keep the pouch naturally closed, and why short flaps tend to gape
How to finish the sides — by gluing or by sewing, including:
- The quick glue method: run glue along both side edges, close, and press
- Machine sewing down one side and back up the other for a sturdier, more characterful finish
- Why sewing before you attach a closure gives the structure better integrity
Tips & gotchas
Leave a small gap between the top of the pocket and where you fold the flap. It sounds like a tiny detail, but if the fold sits right at the pocket opening, the flap will feel cramped and the whole thing looks pinched. A little breathing room there makes a real difference.
Flap length affects whether your pouch stays shut on its own. A longer flap naturally wants to lie flat and closed. A short flap will gape, and you'll end up needing a closure just to compensate — which is fine, but worth knowing before you fold.
For the top layer — whatever piece becomes your main focal point or the most prominent surface detail — use liquid glue rather than just a glue stick. Glue sticks are fine for building up layers underneath, but anything at the very top that you don't want peeling away deserves a proper bond.
If you're not sure whether your base is fully reinforced, hold it up to a light source. Thin sections will show through. You don't need every square centimetre covered, but if there are obviously weak patches near the pocket opening or along the folds, add another layer there.
Water-activated tape (the kind used for stretching canvas) is beautiful when scrunched — it creates a gorgeous textured, aged look. But it activates with water, which means it can warp the paper underneath. Use it sparingly and work quickly.
When you're gluing pages together to build the base, think ahead about text direction. Glue all your pages with the writing going the same way, then flip the whole canvas upside down. That way the inside of the finished pouch reads correctly — much easier than trying to track orientation mid-build.
Sew the sides before you attach your closure, not after. It's much easier to get the sides lying flat and clean before there's a brad or twine getting in the way.
What starts as a pile of rescued paper ends up as a proper little home for a journal you've made, or a beautiful envelope for sending something you're proud of. Once you've made one and seen how freely you can scale the size, it's very hard to stop at just one.



