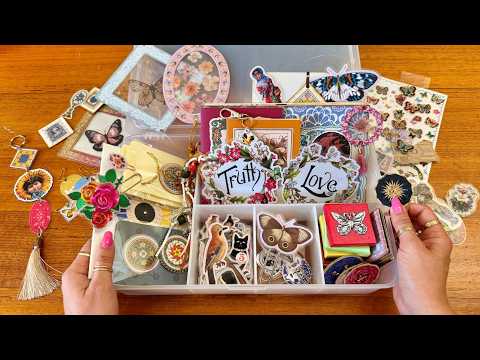
If you've got a stash of stickers you never quite use — maybe tucked away in a book, a tin, or a drawer somewhere — this video is for you. I'm sharing over 15 alternative uses for stickers that go well beyond sticking them down on a page and hoping for the best. Some of these projects involve laminating or acetate, some need nothing more than a piece of tape and a pair of scissors, and several can become things you'd genuinely want to gift or sell.
What we cover
This is a roundup and tutorial hybrid — fifteen numbered ideas, each shown with examples I've made, plus live demonstrations of a few of them. The ideas range from quick two-minute projects (magnets, paper clips) to more involved crafts (suncatchers, beaded bookmarks, jewelry pendants). Along the way I cover two core prep techniques — laminating stickers and mounting them onto acetate — that feed into most of the projects, so even if you only pick up one or two ideas, those two techniques open up a lot.
What you'll learn
How to prep stickers for projects using laminating or acetate — the foundation technique behind most of these ideas, including:
- Laminating stickers for a sturdy, protected surface
- Mounting stickers onto acetate packaging (no laminator needed) for a naturally grippy, clean-backed result
- Using contact paper as an alternative that stays glueable, unlike laminate
How to apply PVA glue before placing a sticker — for stickers that don't have much tack, coating the surface with white school glue first means the sticker bonds properly and won't lift later.
How to make sticker magnets — laminate or mount to acetate, add a magnetic dot or a strip cut from a magnetic real-estate calendar, and you have something repositionable for a fridge, metal trolley, or workspace surface.
How to make keychains and pendants from stickers, including:
- Choosing stickers that look good from both sides (transparent or puffy stickers with metallic backs)
- Using two of the same sticker face-to-face on acetate for a double-sided result
- Adding jump rings, chains, eyelets, and hardware to finish
How to make sticker paper clips — hot-gluing a paper clip to a laminated or acetate-mounted sticker, then covering the hardware on the back with felt or a matching second sticker.
How to turn a sticker into a bookplate — mounting it onto painted chipboard or a cereal-box offcut, inking the edges, and attaching it to a journal cover with brads or glue.
How to make beaded bookmarks from laminated stickers — laminating a sticker for structure, then threading beads onto string below it.
How to make suncatchers, including:
- Using transparent stickers so both faces of the hanging look good
- Cutting two matching acetate pieces and gluing a sticker sandwiched between them
- Using art glitter glue (or another strong adhesive) to bond the acetate layers
- Brushing glue flat to prevent it seeping onto the visible surface
- Finishing with fishhook line, tassels, ribbon, or beads
How to make interactive journal elements — using a sticker as the cover of a small bound booklet, a brad-and-ribbon belly band component, or a swinging mini notepad attached to a journal page.
How to make journaling spots — gluing large stickers onto thick paper so they become loose cards you can tuck into pockets, write on, and move around.
How to make sticker buttons — the full process:
- Coat the surface with PVA glue, press the sticker down, coat again over the top
- Let dry, cut out, paint the back
- Punch holes and set eyelets (or just colour the edge of the hole with a marker)
- Add a gilded edge using gold watercolour for a finished look
How to make mini artworks using stickers as decoupage — painting a small canvas, applying PVA glue, pressing the sticker down, and sealing over the top; or using 3D/puffy stickers without the top coat.
How to use sticky tape or contact paper as a no-laminator alternative — sandwiching stickers between two layers of packing tape or contact paper to create flexible bookmarks, pocket pages, or journal inserts. Stitching around the contact paper version makes a usable pocket.
How to make a wall hanging from stickers — laminating or acetate-mounting stickers in a vertical arrangement with tassels, no need for transparent stickers since the back faces the wall.
Embroidering beads around a mounted sticker — as a slow-craft idea for jewelry, suncatcher variations, or journal cover embellishment.
Tips & gotchas
When making a beaded bookmark, don't start your beads right at the top of the string. Leave a plain length of string first, then begin threading beads lower down — it lets everything hang naturally rather than sticking up awkwardly past the page.
For suncatchers, keep your glue away from the inner edge of the acetate frame. When you press the second acetate layer down, any glue sitting close to the edge will seep inward and leave a visible mark on the clear surface. Brush the glue flat and work a little distance from the edge — I learned this on the first one I made, and you can still see the ghost of it if you hold it up to something dark.
Laminated stickers are genuinely difficult to glue down because the surface is plastic and nothing wants to stick to it. If protection is what you're after but you also need to glue the sticker into a project, contact paper is a better choice — it gives you that near-laminated look on the face while leaving the back glueable.
For stickers with very little tack (the kind that peel off paper almost immediately), apply a coat of PVA glue to the surface before placing the sticker. Press it down into the glue, then coat over the top. Once dry, that sticker is not going anywhere.
When coating acetate-mounted charms or stickers with Mod Podge or PVA, hold the piece in your hand rather than laying it flat — it lets you cover the edges and the acetate border in one go, which seals everything together neatly.
The sticker books that felt overwhelming before start to feel like a supply rather than a commitment. I've also linked my oversized buttons video in the description if the button idea caught your attention — there's a whole world of ways to use handmade buttons in journals and as standalone pieces.



