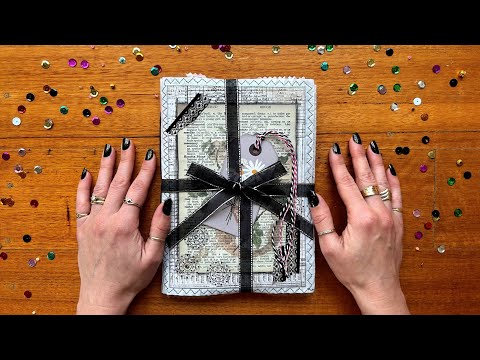
If you've got a bubble mailer sitting in your recycling — or a box of chocolate packaging your kids have been eyeing — this short tutorial might be exactly what you need. I made this one on an unplanned sick day, pulling apart packaging materials and seeing what they could become. What came out was a small junk journal with noisy bubble wrap elements, a pouch-style pocket, layered tags, and a bound signature, all from materials I would otherwise have thrown away.
What we cover
Starting with nothing but bubble mailer packaging, chocolate box inserts, and a few paper scraps, I work through making a noisy sandwich tag, a bubble wrap pouch with a sewn pocket, and a full cover — then bind it all into a finished junk journal. The whole process is improvised and unplanned, which is part of the point.
What you'll learn
How to make a "noisy" tag by sandwiching bubble mailer material between paper layers — the technique involves gluing tea-dyed paper to each side of the packaging insert, inking the edges, and then sewing around the whole thing to secure it even where glue struggles to hold on plastic surfaces.
Why leaving a margin of bubble wrap visible on the outside of a tag keeps the noise alive — once I sandwiched the material fully between two paper layers, it lost most of its satisfying crinkle. Keeping a visible strip of bubble wrap at the edge is the fix.
How to turn a bubble mailer into a sewn pouch with a built-in pocket, including:
- Cutting the mailer open to a single flat layer
- Inserting a page protector sleeve (damaged ones work perfectly here) and sewing all the way around with pinking shears to finish the edges
- Using the two sides of the finished pouch — one for the pocket, one for display
How to use double-sided tape instead of glue on plastic and bubble wrap surfaces — glue can hold, but it's unreliable on these materials. Double-sided tape gives a cleaner, more immediate bond and doesn't warp the plastic.
How to prepare plastic edges for sewing so they don't shift under the machine — I wrap the raw edges with a small strip of plastic before sewing, which keeps everything stable and prevents the layers from sliding around as you go.
How to build a simple cover from packaging materials, including:
- Using watercolour pencil around the edges and working in a little water for colour
- Adding washi tape and stamping as light embellishment (and knowing when to stop)
- Sewing the cover sections together in stages rather than trying to do it all in one pass
How to bind a signature to complete a cover like this into a full journal — the binding comes at the end, once the cover is finished, and it's what turns the whole collection of pouches and tags into something you can actually use.
How to assemble a themed tag-and-pocket set from paper offcuts — once the structural pieces are done, I go through my folder of paper scraps and pull anything that fits the palette, building a small pack of matching inserts for the pockets.
Tips & gotchas
Double-sided tape is your best friend on plastic. Glue sometimes holds on bubble mailer surfaces — it did for me — but it's not reliable, and you won't know until it's too late. Double-sided tape sticks immediately and doesn't introduce moisture that can cause plastic to buckle or warp.
Leave that margin of bubble wrap exposed. The whole appeal of using this material is the noise and texture. If you fully cover it with paper on both sides, you lose both. Even a small visible border at the edge of a tag keeps the sensory quality intact — and honestly, it looks better too.
Sew around it anyway. Even when the glue holds well, sewing around the edge adds security and gives a finished look. On plastic especially, where you can't be sure the bond will last over time, a line of stitching around the perimeter is cheap insurance. I use a basic sewing machine with a straight stitch, but zigzag works nicely on the edges too.
Wrap the edges before you sew. When I was ready to sew the cover together, I found the plastic layers wanted to slide around. Tucking a small strip of plastic around the raw edge before going to the machine held everything in place. It takes an extra minute and makes the sewing much cleaner.
Pinking shears do a lot of work here. On materials that fray or look rough when cut straight, zigzag scissors clean things up without any extra effort. I follow the cut I've already made, so it's more finishing than trimming.
Know when to stop embellishing. I went through a round of stamping and washi tape on the cover that wasn't doing anything useful. Watercolour pencil at the edges, a little water, and a few considered additions ended up being enough. The materials themselves carry most of the visual interest — they don't need much help.
Once you've made one noisy tag or bubble-wrap pouch, you'll start looking at packaging differently. These same techniques work with other plastic packaging materials, and the sandwich-and-sew approach translates well to page protectors, plastic sleeves, and anything else that won't take glue reliably. It's a good method to have in your hands.


