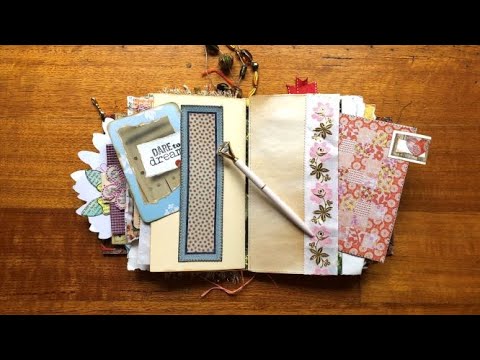
If you've got a pile of old magazines you picked up for free — or nearly free — and a junk journal page that needs something, this video is exactly the kind of company you want. I work through a full spread using images torn from a secondhand patchwork and stitching magazine, building a page with a belly band, a pocket, a tuck spot, and a little tab, all from scraps I already had on hand. There's no plan at the start, just a page, a pile of paper, and an idea that unfolds as I go.
What we cover
This is a real-time junk journal working session — not a structured tutorial with a fixed outcome, but a genuine improvise-as-you-go page build using magazine images, scrap paper, cardstock backing, travel brochure clippings, and a bit of machine sewing. The page ends up with multiple functional elements and a "dare to dream" stamped journaling prompt, ready to be filled in when the mood strikes.
What you'll learn
How to build a junk journal page from scratch with no plan — working through decisions in real time, responding to what's in front of you rather than following a set design.
How to back flimsy paper with cardstock or packaging material, so it's sturdy enough to use as a belly band, pocket, or tuck spot without falling apart once things are sliding in and out.
How to make a belly band from a single magazine image, including:
- Choosing and trimming a piece to the right width
- Understanding why backing it matters when it's going to carry weight
- Fitting it to the journal so it slides on and off cleanly
How to create a pocket and tuck spot on the same page, layering elements so each has a purpose — one for tucking a pull-out card, one for loose ephemera or notes.
How to make a small decorative tab using a circle punch, scraps, and a sliver of white paper to make it pop against a busy background.
How to use rubber stamps on a junk journal page — here, a "dare to dream" stamp with archival ink, and how to recover from a slightly wonky impression by adding a hand-drawn border or layering a scrap of paper over it rather than scrapping the whole thing.
How to use machine sewing to secure paper layers, and what to do if you don't sew — a strong glue (not a cheap glue stick) does the same job.
How to pull a color palette together from random scraps — watching for repeating tones (the pink, blue, and little hits of red and orange here) to make a page feel like it belongs together even when nothing was planned.
Tips & gotchas
Back flimsy paper before you commit it to a functional element. Magazine pages and travel brochure paper feel fine until you're sliding something in and out of a belly band twenty times. Gluing onto a piece of cardstock or saved packaging card first gives it the structure to hold up. I use the waxy-backed packaging that comes through my door for exactly this — saved in a folder and ready to go.
If you're not a sewer, use a strong glue — not a cheap glue stick. A glue stick is fine for things that are just sitting there, but if a pocket or belly band is going to take any handling, it needs a proper hold. What I use for machine sewing, you can replicate with the right adhesive. Just protect the page underneath while you're gluing in case anything seeps through.
Match your thread colour to your paper. I had brown thread in my machine and used it on a lighter piece — and it shows in a way I wasn't happy with. For the second piece I changed the top thread to white, and the difference was immediately obvious. It's a small thing but it matters when the stitching is part of the look.
A wobbly stamp impression isn't a disaster. When my "dare to dream" stamp landed a little off, I added a hand-drawn border around it to frame it intentionally — and it worked. If that's not enough, you can layer a scrap of coordinating paper right over the top. This is a junk journal, not a gallery submission. Work with what happens.
Add a sliver of white (or contrast) under a tab if it's getting lost. The little circular tab I made was disappearing into the patterned paper behind it until I slipped a scrap of white underneath. That small thing made it readable and gave the whole element presence.
That's something I've been enjoying in this journal lately: building the page as a kind of creative container first, then letting the journaling fill it when it wants to. Pages like this one tend to hold more than you planned for them.


