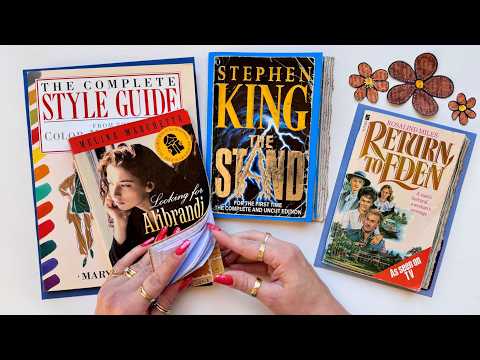
If you've got old softcover books sitting around — ones that are too highlighted to donate, falling apart at the spine, or just too outdated to pass on — this tutorial is exactly what to do with them. I turn two of those books into something genuinely useful: a proper multi-signature journal using the original cover and spine, and a collection of hand-drawn, hand-colored book page flowers for junk journaling and mixed media projects.
What we cover
Two connected projects, both built entirely from old book materials. The first is a softcover journal made by reinforcing the original spine, covering it with washi tape, and binding in four signatures using a three-hole pamphlet stitch. The second is a flower-making tutorial — drawing, coloring, and fussy-cutting flowers directly from book pages to use as ephemera in journals and art books.
What you'll learn
How to assess an old softcover book and decide what to make from it, including:
- Using the full cover and spine as a journal cover
- Folding just the front cover onto card stock for a simpler notebook
- Adapting your approach based on how the cover detached
How to reinforce a soft spine with card stock — cut a piece the same width and height as the existing spine, then attach it using both double-sided tape and glue together for a bond that actually holds. Either alone is less reliable; both together is what I reach for.
How to cover the spine and front and back covers with washi tape — smoothing it down cleanly and trimming the excess. Simple, but the results are genuinely beautiful, especially with a patterned tape you've been saving for the right moment.
How to size signatures to fit a found cover — using one folded sheet as a size template for the rest, checking height against the cover and width against the open spine. Leftover trimmed strips go straight into a notepad pile; nothing goes to waste.
How to make and use a binding template for multiple signatures, including:
- Folding a strip of card stock to match signature height, then folding again to mark three hole positions
- Writing "top" on the template so orientation is never ambiguous
- Spacing four signature lines evenly across the spine, then using the template to transfer hole markings to each line
How to bind multiple signatures with a three-hole pamphlet stitch — working one signature at a time, exiting through the middle hole, looping to top and bottom, returning through the middle, tying off with a double knot. The binding for all four signatures in this journal took about ten minutes once the prep was done.
How to draw book page flowers for ephemera — using a Sharpie directly onto a book page, drawing a loose variety of flower shapes (round petals, pointy petals, big centers, tiny clusters) without worrying about perfection. Imperfect shapes read as whimsical in the finished project, not sloppy.
How to color book page flowers with inexpensive markers, including:
- Working flower by flower across a full page before moving on
- Leaving centers for last, then choosing a contrasting color (orange against blue, yellow as a general default)
- Adding white pen dots and details on darker flowers for depth — letting the dots dry fully before cutting
How to fussy-cut book page flowers efficiently — cutting away excess paper around each flower first before tackling the detailed outline, and moving the paper rather than your scissor hand. That one shift makes a real difference over a long cutting session.
Tips & gotchas
Only use books that genuinely can't be donated — heavily highlighted, falling apart, or so outdated they'd be binned on arrival at the op shop. It's worth reminding yourself of that before you pick up the scissors, especially with books that carry some personal meaning.
When reinforcing the spine, use both double-sided tape and glue — not one or the other. I changed my mind on this mid-project and I'm glad I did. The double-sided tape holds while the glue dries; together they create a sturdier bond than either would alone.
Always write "top" on your binding template before you start poking holes. It takes two seconds and saves the genuine frustration of flipping a template the wrong way and ending up with misaligned holes across four signatures.
Your signature holes absolutely must land in a straight line along the spine. Draw the lines first, even if they're hard to see against a busy pattern — you can see them well enough to align the template, and they disappear once the signatures are bound in.
When cutting out flowers, let your white pen dots dry completely before you start. Wet ink on your fingers transfers to everything, and smearing a dot you just placed on a finished flower is annoying.
Cut away the background paper around each flower before tackling the detailed outline — it's much easier to maneuver a smaller piece. And move the flower into your scissors rather than chasing it with your cutting hand. Your scissor hand can stay almost still; the paper does the traveling.
I used only four pages for flowers in this video, which barely makes a dent in a full book block. There are dozens of other things to do with the rest, and I've linked a separate video in the description that works through over 25 projects from a single book if you want to go further down that path.


