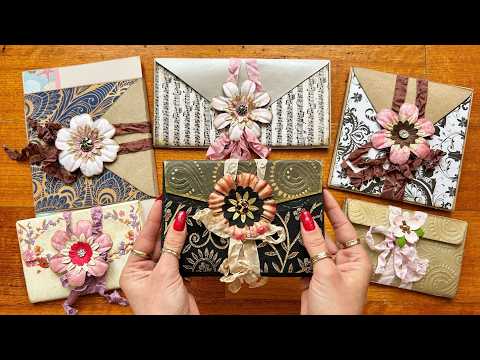
If you've been looking for a small journal project that makes a real impact with almost no special equipment, this envelope notebook tutorial is a good place to start. Using just a few identical envelopes, a scoring tool, needle and thread, and a brad or earring closure, you end up with a structured little book — a spine, two sewn signatures, and three or more pockets — that works as a gift, a standalone mini journal, or an insert for a larger book. I made six of these in two days, and what I want to show you is exactly how they go together.
What we cover
This tutorial walks through building an envelope notebook from scratch: gluing and stacking envelopes to form a spine, scoring a fold that actually closes cleanly, sewing two signatures using the three-hole pamphlet stitch, and attaching a brad-and-ribbon closure with a tidy lined interior. Toward the end I also experiment with a six-envelope accordion-style ephemera folder — no signatures, just a cascade of pockets — as a separate idea worth exploring.
What you'll learn
How to stack and glue envelopes so the book closes properly — the key is not gluing each envelope flat onto the previous one, but wrapping the flap over the stack and gluing it onto the next envelope. This is what creates the progressive spine spacing that lets the book close without buckling.
Why glue placement matters near the crease, including:
- Keeping glue away from the fold line so it doesn't seep out when you press down
- Applying glue all the way to the envelope's outer edge (so the pocket seals) while staying clear of the spine edge
How to score a spine that sits right, including:
- Loading the signatures into the envelope stack first to feel exactly where the fold wants to be
- Marking that point, removing the signatures, then scoring — not the other way around
- Why a too-wide spine causes the book to flatten awkwardly instead of sitting upright (I show one of mine where I made exactly this mistake)
- How to score without a scoring board — a ruler, a mouse pad or soft surface, and light pressure are all you need
How to cut and attach an inside flap lining — tracing and cutting the cover piece before you attach the closure means you can hide the brad prong cleanly and create a neat interior. If the piece comes out very slightly larger than the flap, it gives a nice border rather than a problem.
The three-hole pamphlet stitch for two signatures, including:
- Why the first signature always goes in before the second — its thickness determines where the second one sits
- Going from the middle hole outward, then back through the top, out through the bottom, and back through the middle
- The needle-to-thread trick (bring the needle to the thread rather than threading from above) — it sounds tiny but it genuinely works every time, even with thread that splits
How to build a brad closure using a stud earring as a DIY brad, including:
- Layering paper flowers, gluing all layers before inserting the prong
- Orienting a single-prong earring so the prong faces away from the closure direction (so the ribbon can't slide off)
- Reinforcing the hole in thin paper with masking tape on both sides before inserting the brad
- Using crinkle seam binding, twine, or torn fabric scraps as the wrap-and-tie closure string
How to add a decorative pocket to the front cover — cutting a half-circle opening in a piece of patterned paper, gluing it down on three sides, and leaving the opening free. I use a small round mirror as my circle template, which I'd somehow never thought to do before.
How to build a six-envelope accordion ephemera folder — stacking envelopes without signatures so each spine section grows progressively wider, creating a fan of pockets that opens out flat. I walk through the logic of why each additional envelope needs more spine space than the last, and what happens if you don't account for it.
Tips & gotchas
Stay away from the crease when gluing. Every time you apply glue near a fold line, it will seep through when you press. Apply right up to the outer edges of the envelope pocket, but leave a clear gap at the crease.
Score gently. Pressing hard will damage or even cut the paper. A light pass with your tool against a ruler is enough — you're just giving the paper a direction to fold, not carving a line.
Don't make the spine wider than it needs to be. Load your signatures in, close the flap over the top, and mark where the fold naturally wants to fall. That's your spine. Any wider and the book will want to flatten itself open rather than stand upright.
When sewing two signatures, always bind the first one before the second. The first signature adds thickness that shifts exactly where the second signature sits. If you try to measure both at once, your second set of holes won't line up.
Reinforce brad holes in thin paper with masking tape on both sides. Open and close the journal enough times and a bare hole will tear through. The masking tape is hidden under the flower anyway, so use it freely — inside and out.
Prepare the inside cover panel before you attach the closure. Once the brad prong is bent or glued in place, tracing around the flap becomes very difficult. Cut and ink the lining piece first, set it aside, attach the closure, then glue the lining over the top.
For the accordion folder: each envelope needs progressively more spine space. The gap you leave at the spine has to grow with every envelope you add. If you keep the spacing even, the later envelopes won't close flat.
The notebook format with signatures is the one I'll keep making for gifts and journal inserts, but the accordion version feels like its own project worth a proper tutorial. If either of those sounds like something you'd make, this video is a good place to start getting the construction under your fingers.


